
Learn how to create custom email templates for your online store. Personalize your emails to match your brand and improve student engagement and retention.
Creating email templates for your team can save time and ensure consistency in your company's communications. In just a few simple steps, you can build email templates on EdCommerce, incorporating your branding and design elements.
In this article...
- Types of email notifications
- How to customize the content of your email notifications
- How to set up who receives your email notifications
Types of email notifications
1. Booking confirmations
🔹 To: Students - 'Student - Booking confirmation'
🔗 Example
The student will receive a notification informing them that the booking has been created, and that you will contact them to continue with the application process.
🔹 To: Admin Users - 'Admin - Booking confirmation'
🔗 Example
The Admin users of your EdCommerce account can also receive a notification when a student makes a booking through the platform.
2. Sign-in credentials
🔹To: Students - 'Student - Sign-in credentials
🔗 Example
The student will receive an email notification with their login and password credentials.
🔹To: EdCommerce Admins - 'Admin - Sign-in credentials'
🔗 Example
Your admin users will receive an email notification with the login and password credentials.
3. Password reset email confirmation
🔹To: Students Student - 'Password reset email confirmation'
🔗 Example
The student will receive this email notification to reset their password.
🔹To: EdCommerce Admins 'Admin - Password reset email confirmation'
🔗 Example
The admin users will receive this email notification to reset their password.
4. Lead form confirmation
🔹To: Students - 'Student - Lead form confirmation'
🔗 Example
When a student fills out one of your lead forms, they will receive this email confirmation, letting them know that their information has been received correctly. Rest assured, we will get back to them as soon as possible.
🔹To: EdCommerce Admins - 'Admin - Lead email confirmation'
🔗 Example
This email will be sent to admin users, informing them that a student has filled out the contact form.
How to customize the content of your email templates
The first step is to navigate to the settings section of your Edcommerce site > Email Templates > Builder.
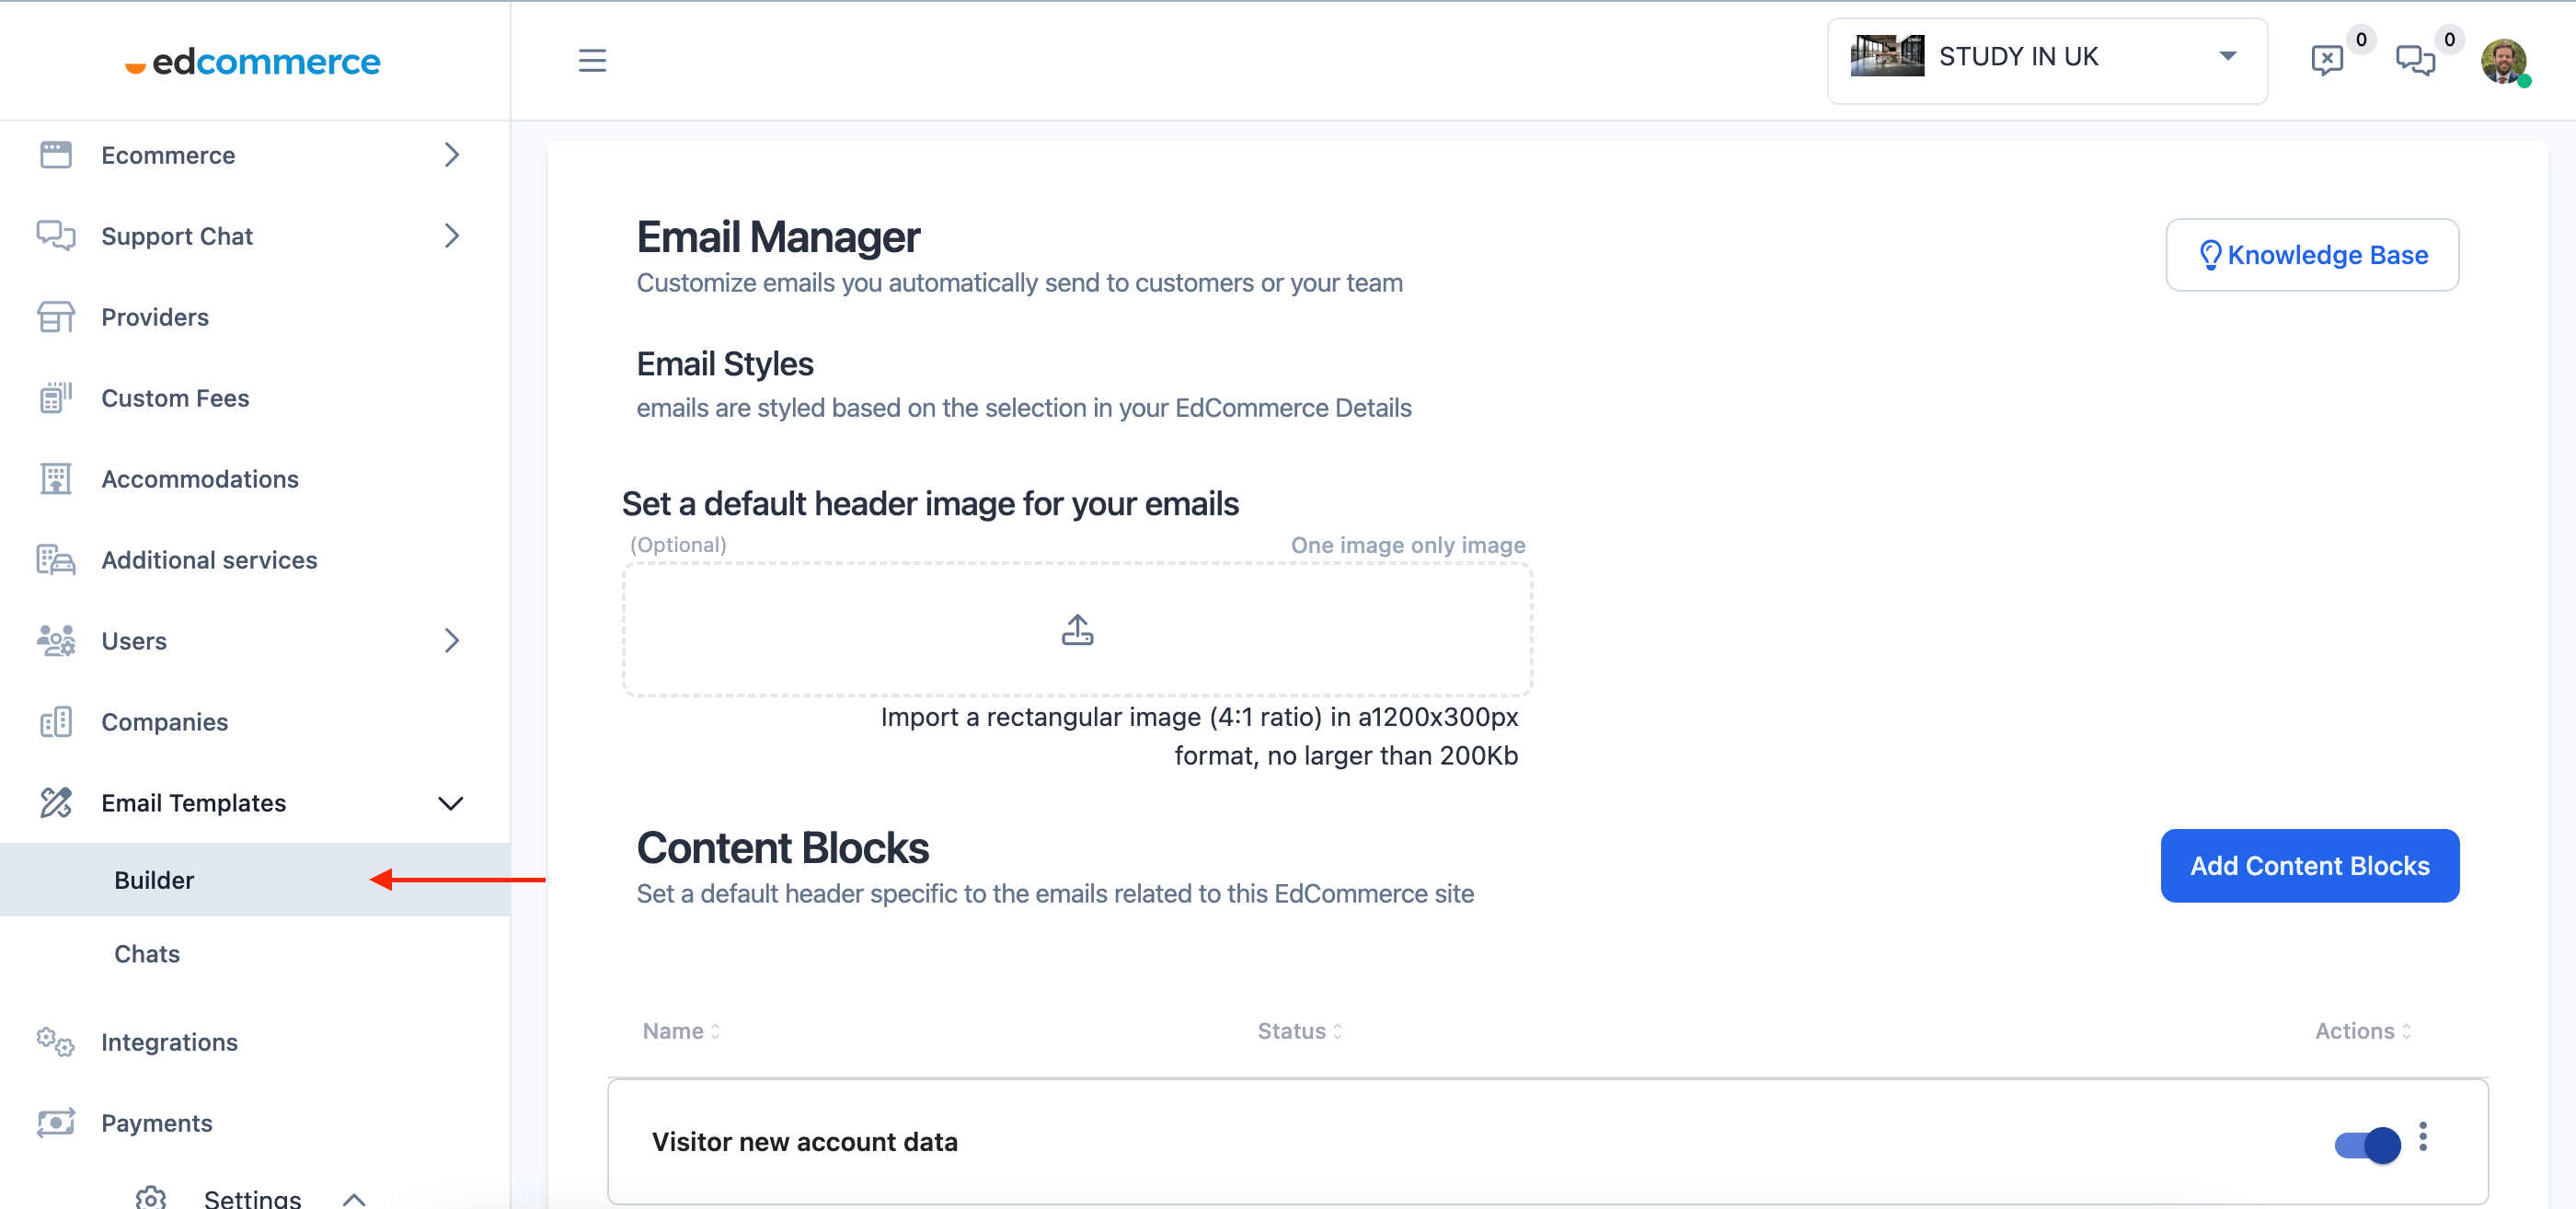
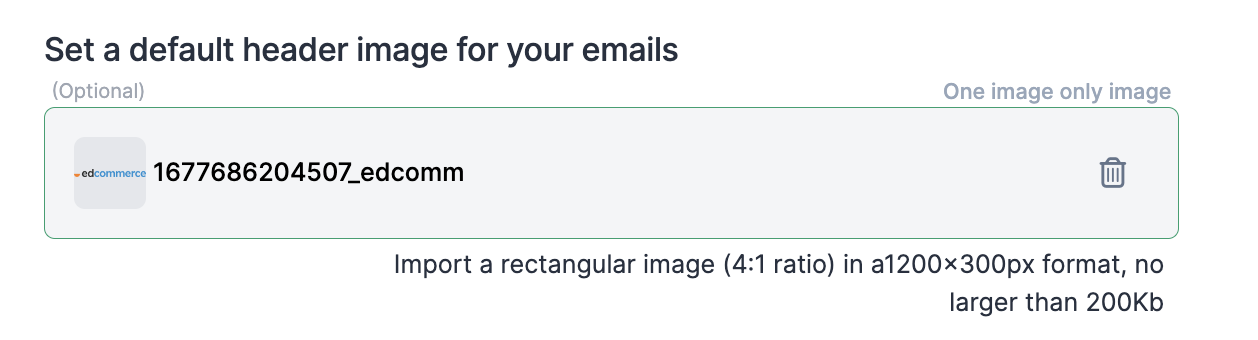
Header Image
The first field allows you to upload a header image to include in your emails, such as your company logo or other branding elements. This instantly enhances the recognition of your emails and reinforces your company's brand identity.
Content Blocks
Content blocks are all the pre-designed elements that compose an email, including the header, body, footer, and call-to-action button. You have the flexibility to enable or disable these blocks and customize them according to your requirements.
It's important to understand the distinction between "Content Blocks" and "Email Templates."
- Content blocks refer to the area where you can customize and design the content of your email.
- Email templates define the overall structure of your email, which can include different content blocks with predefined content.
- To create a new content block just click on the blue button "Add Content Blocks"
- To edit one of your content blocks, click on the 3 dots icon and then "edit".
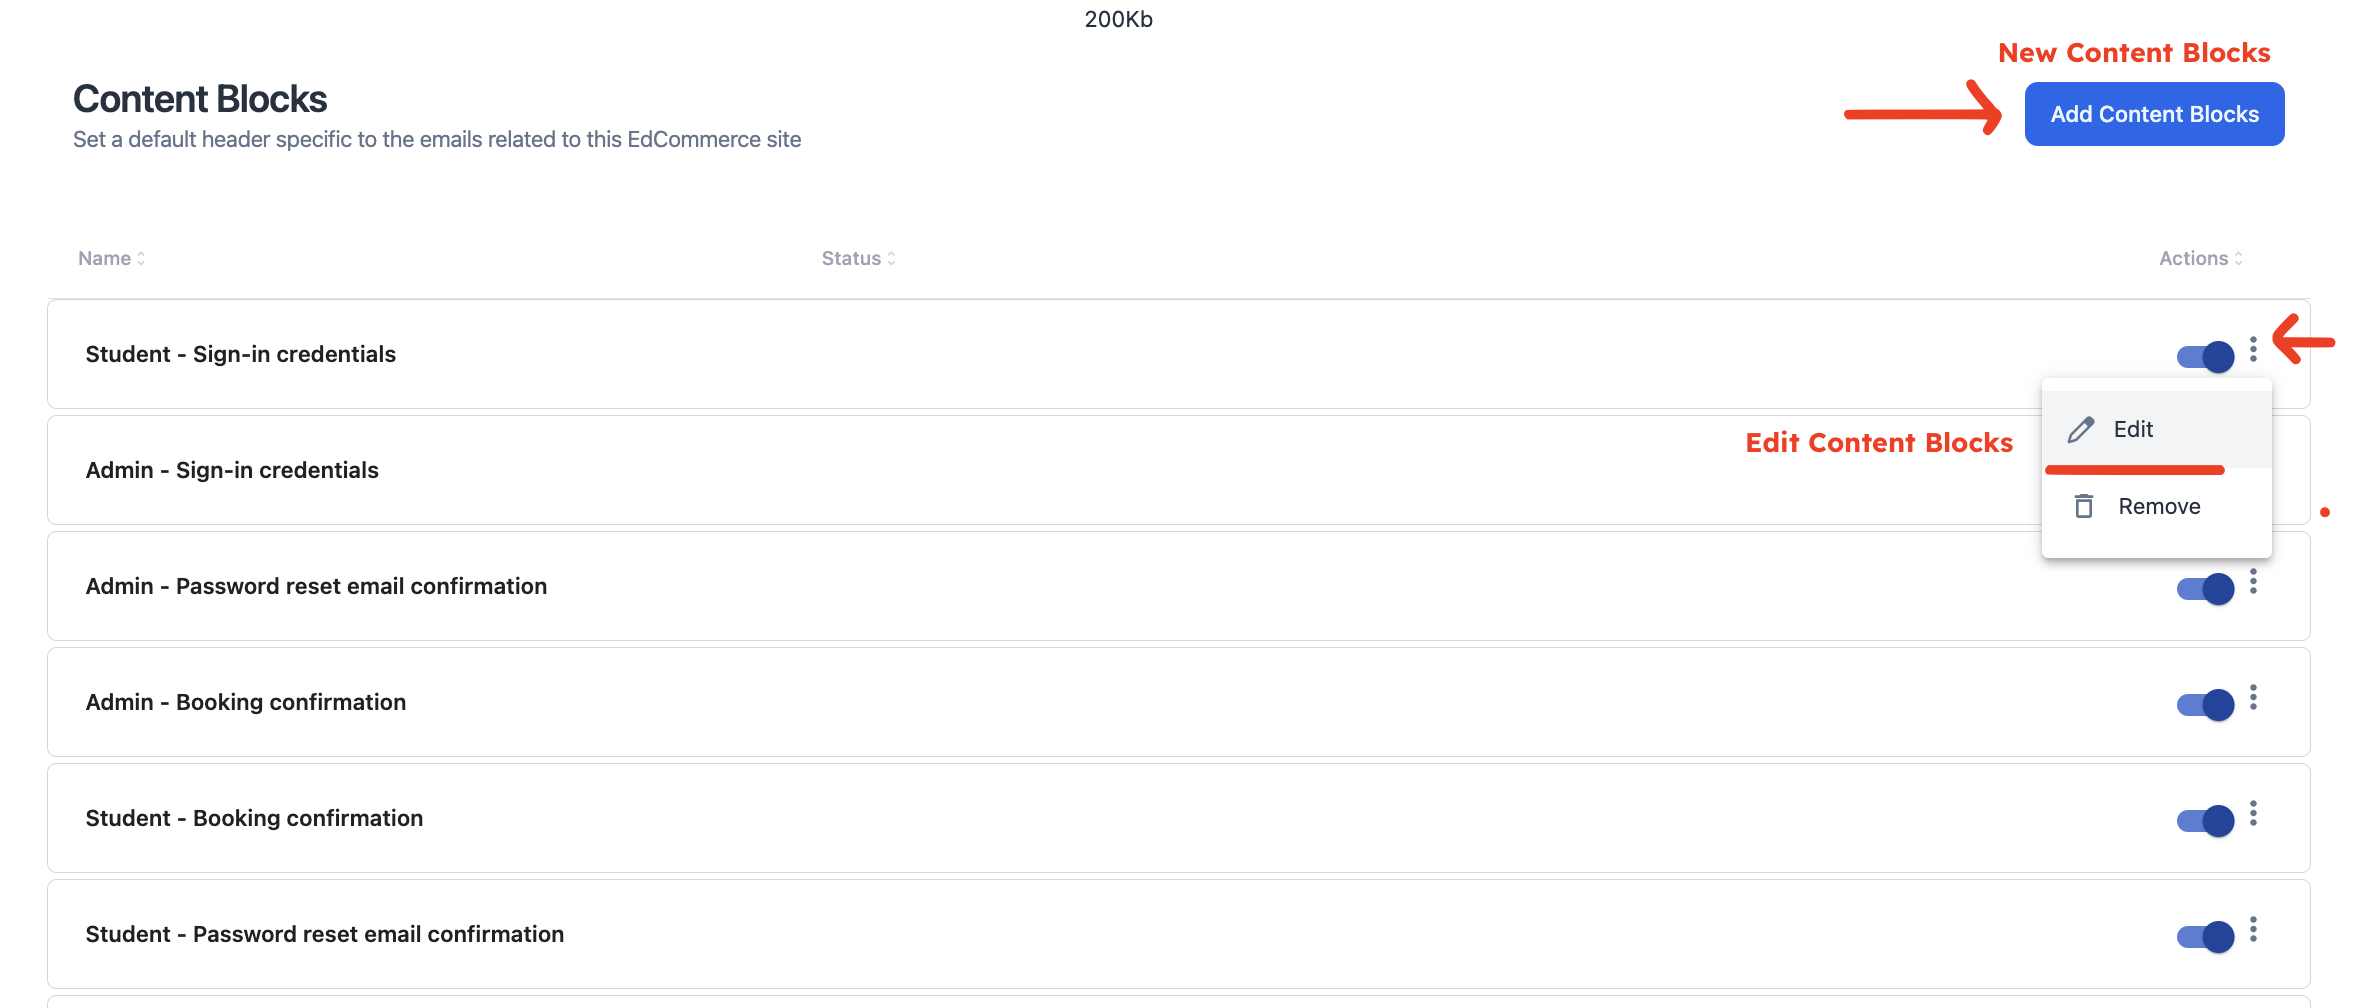
Both options will open a preview of your content block on the left side of the screen.
On the right side, you can modify information such as the title, subtitle, description, and other details. Once you're satisfied with the block, you can save it, and it will be available for use in your email templates.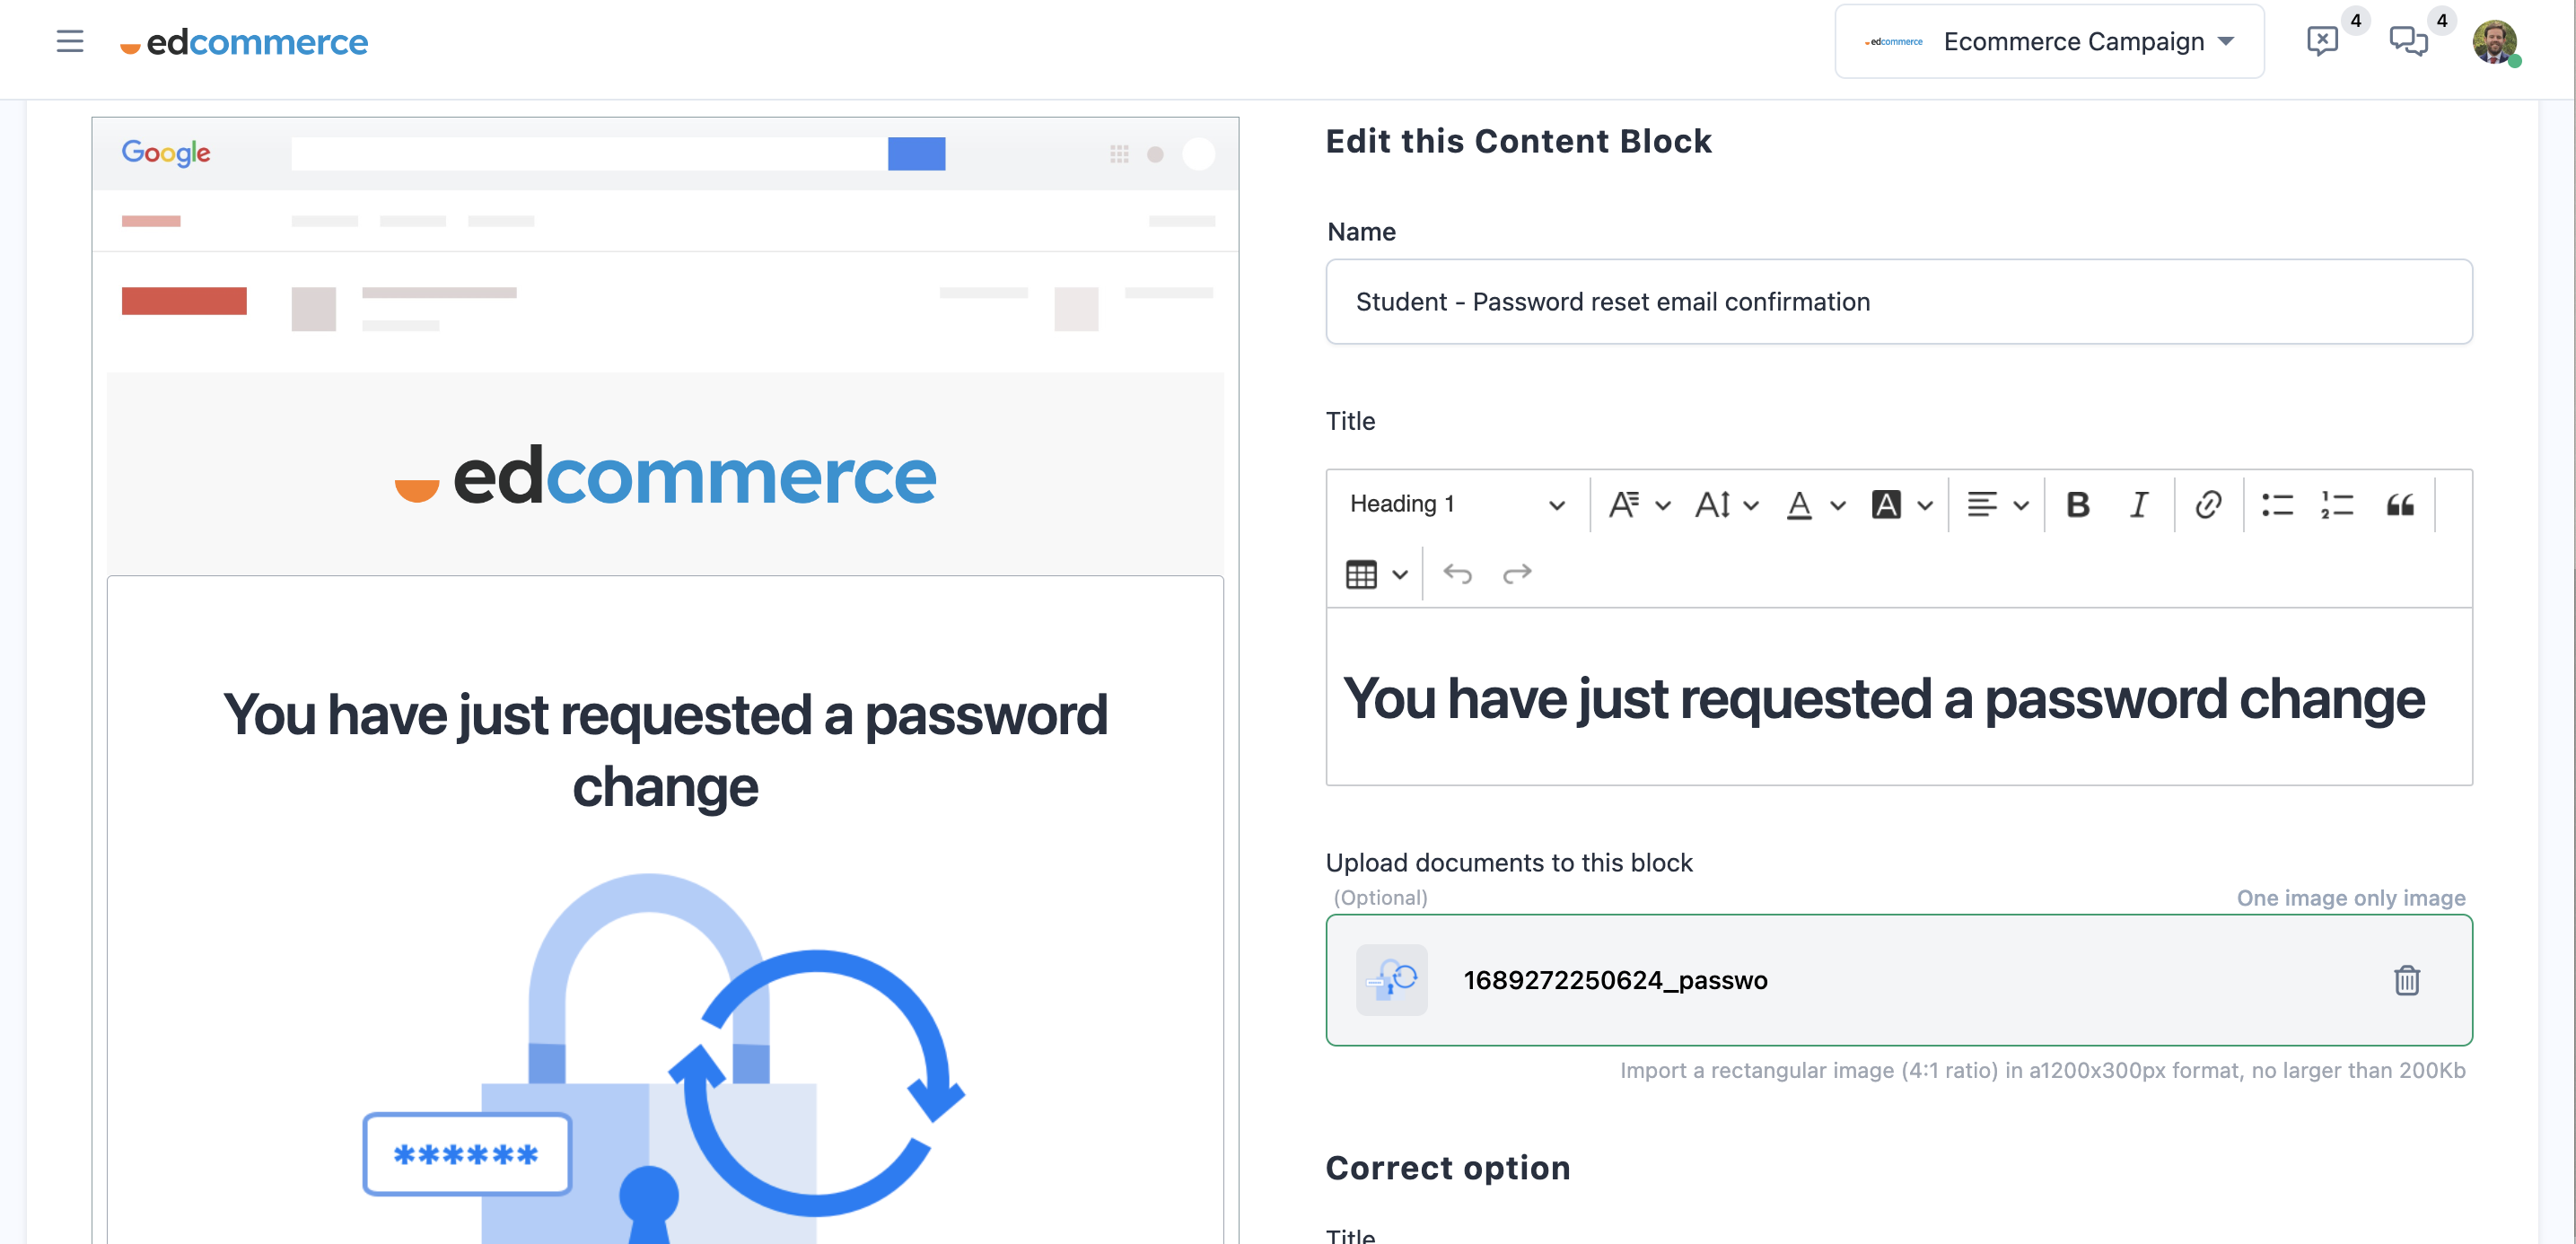
💡In the "Content Blocks" section, you will find a block specifically designed for the footer of your emails, as well as a block for your contact details.
You can drag and drop these two blocks at the end of your emails to provide additional information and ensure compliance with legal requirements.
Email Templates
Once you have customized all the content blocks, it's time to customize your email templates, which define the structure of your emails. Simply scroll down until you find the 'Email Templates' section.
Follow the same process:
- To create a new template, click on the blue button "Add design."
- To edit one of your templates, click on the three dots icon and select 'Edit.'
You will then get access to the editor, where you can modify the structure of your email template.
On the left side, you will see a preview of this notification email template, while on the right side, you will find a list of content blocks that were created previously.
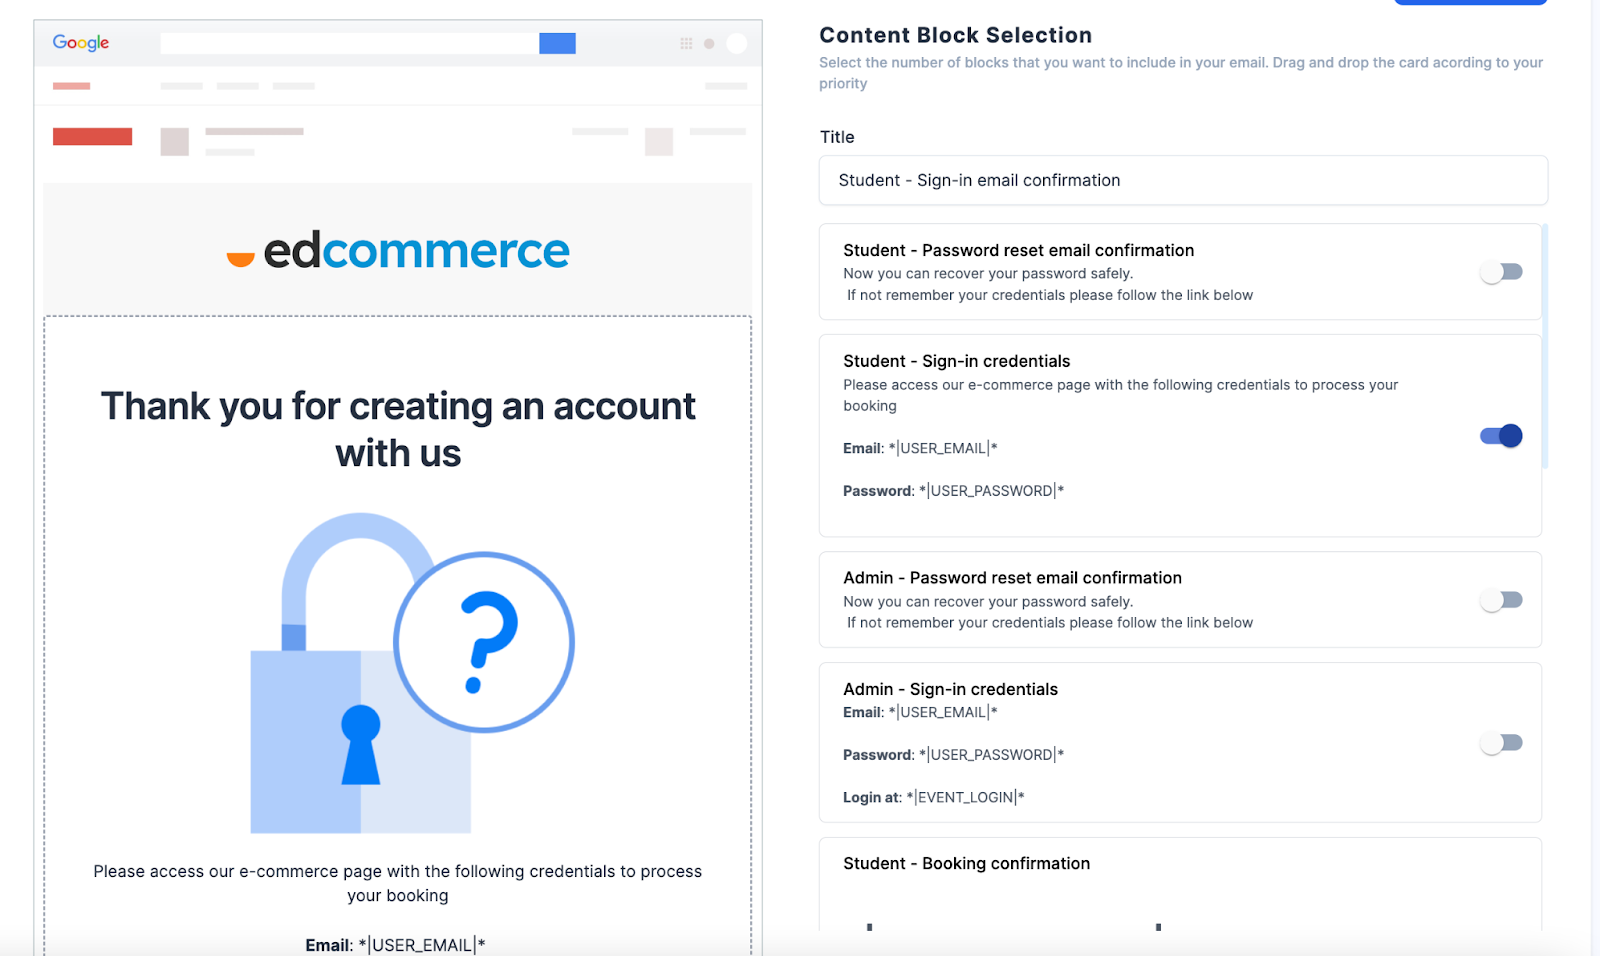
You'll find "toggles" next to each content block, allowing you to activate or deactivate them. Additionally, you can freely drag and drop the active content blocks onto the email preview to arrange them in the desired position.
Don't forget to save your design before leaving the page.
How to set up who receives your email notifications
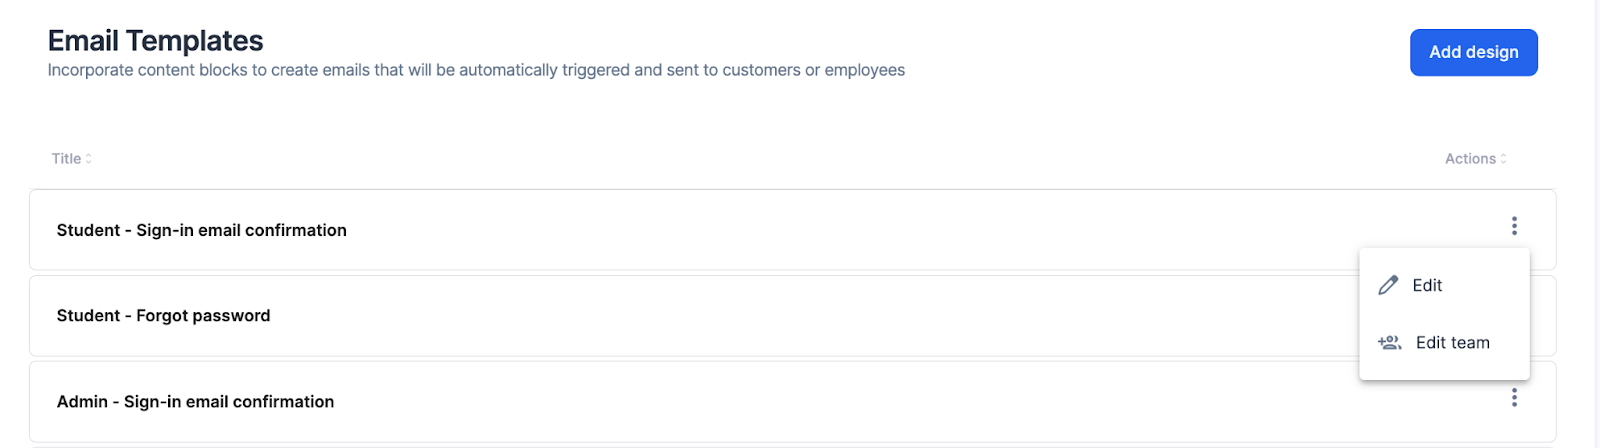
To set up the recipients for each email template, go back to the main section, click on the 3 dots icon, and select 'Edit Teams'.
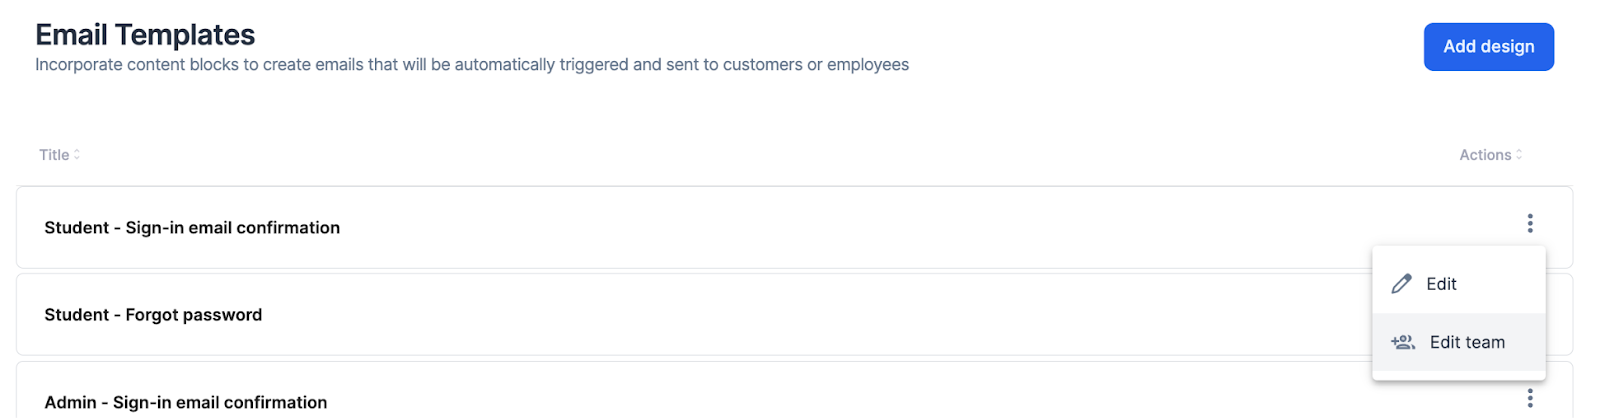
Here, you will find a list of all the teammates that you have added to the EdCommerce platform. Depending on the email template you are editing, you can select the person who will receive notifications whenever a student makes a booking, creates an account, or requests more information through the contact form.
