
All you need to know to create a new page on Edcommerce, step-by-step.
A site in Edcommerce is a specific landing page that has a concrete purpose.
For example, within your Edcommerce account, you can have a site for the Black Friday campaign, another for onshore clients, and another site for a group of junior students traveling to Canada. When the campaign ends, you can deactivate or modify your site.
💡 An Edcommerce account can have multiple sites, which can be active or inactive. Before you start, make sure you already have an account with your login and password, if not, jump back to this article and follow the steps.
In this article...
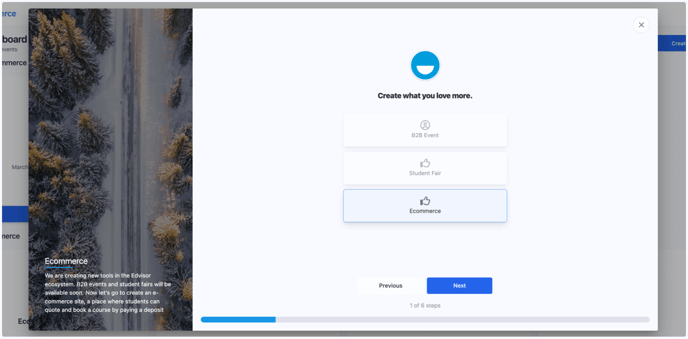
1. Create a new site
To get started, simply click on the "Create Site" button.
The first step in the process will take you to the site type selection screen, where you can choose between different site types. *Only Ecommerce is available at this time.
2. Customize your site
On the next screen, you will configure some basic details of your site. You can upload your logo, select your time zone, specify the duration for which you want your site to be active, modify your site's URL, set the site's title and description, include your privacy policy, choose your site's font, language, and main currency.
All these initial settings can be modified later in the 'ECommerce Details' section of your settings page.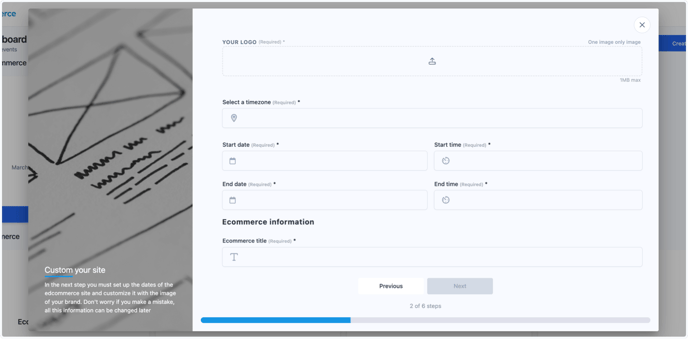
3. Set up your school providers.
From here, you'll be asked to set up your school providers.
This is where you can connect your Edvisor account using the API key that's provided by your account manager.
You can also choose to start from scratch, which means you'll have no partners connected and will build your own custom partners manually. If you choose this option you'll loose access to other important features within the platform.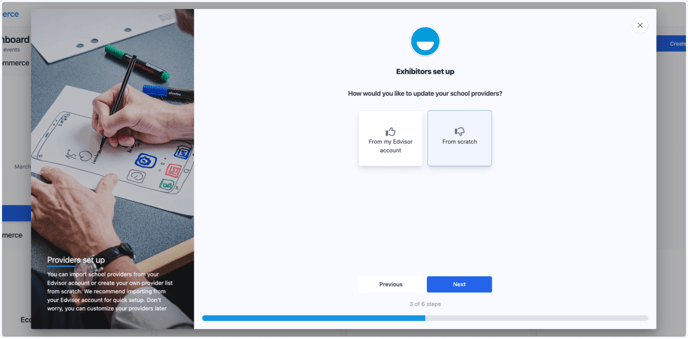
4. Validate your Edvisor API Token
After plugging in the API key that was provided to you, click on "Validate Token" to start loading all the school information tied to that API key or your Edvisor account.
This process is automatic and should not take too long.
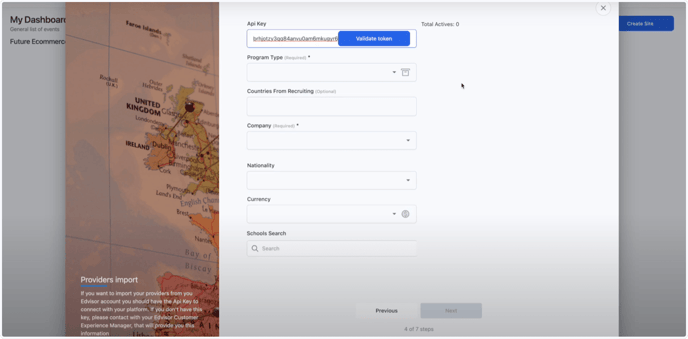
- Once you've validated your token, you can add the program types you'd like to have on your site.
- You can also add the available destinations and student nationalities.
- The office of your Edvisor account where you want these leads to go into.
- And your main currency.
Finally, you'll need to enable the providers and campuses you'd like to appear on your site.
You can select them one by obe, or, simply click 'import all' to activate all the available providers based on the preferences you set in the previous settings.
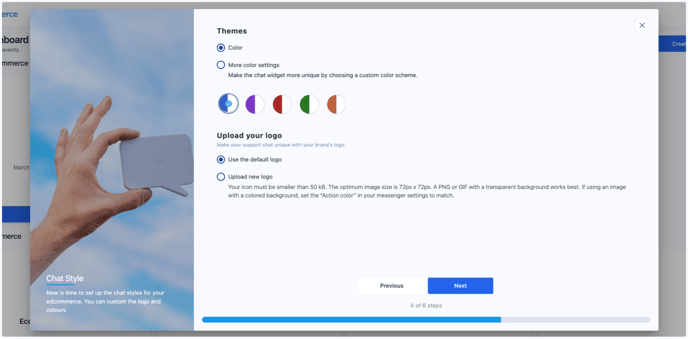
5. Customize your chat widget
All EdCommerce sites include a chat widget, in the next step you'll customize the style of your chat, editing the colours and the chat icon.
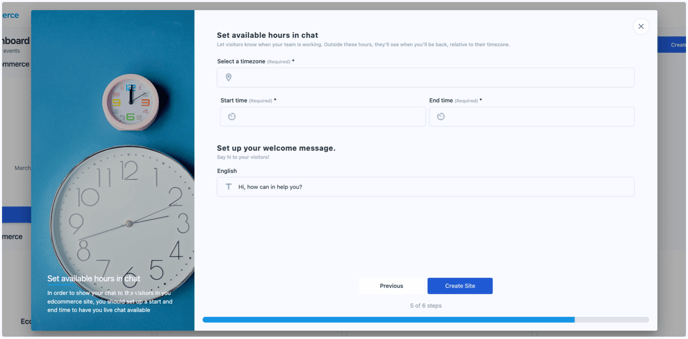
Next, you'll set the hours that you want your live chat to be available by selecting the time zone, along with the start time and the end time.
You can also set up a quick welcome message and customize it before clicking on "Create Site."
And select if you'd like to use the EdCommerce chat or your WhatsApp Business account.
That's it! You've successfully created a new site on EdCommerce! 🎉
You can go back to these settings anytime from the settings section of your site.
If you have any questions or need further assistance, contact our support team for help.